BLACKBOX 200
Repurposing legacy hardware into a self‑hosted server to power our mesh network dashboard.
OPEN MISSION PAGEProject Background
As a grassroots organisation, we operate on a shoestring budget and rely on ingenuity to achieve our goals. Rather than purchasing expensive infrastructure, we harvest old technology from garages, attics and thrift shops. BLACKBOX 200 symbolises this ethos: turning a decommissioned Barracuda 200 appliance into a fully functional server for our mesh network projects.
Reusing Old Technology
There is a wealth of discarded hardware available for next to nothing. By stripping down obsolete firewalls, NAS devices and networking gear, we salvage power supplies, cases and cooling systems. Components that can’t be reused are responsibly recycled. This approach minimises waste and provides us with a library of parts for custom builds.
♻️ The Reality of E‑Waste
Every year, tons of computers, printers, routers and phones are discarded—not because they’re useless, but because they’re considered obsolete. This global wave of electronic waste (E‑waste) hides a massive opportunity for local innovators.
People rarely reuse or salvage parts because:
- They lack technical know‑how or confidence to open devices safely
- Manufacturers intentionally design products to discourage repair
- Modern consumer culture favours replacement over restoration
But you should — because E‑waste is full of valuable, reusable components that can power new inventions with zero cost. Salvaging is both sustainable and strategic: it builds technical literacy, reduces dependency on supply chains and keeps technology accessible to small creators and local labs!
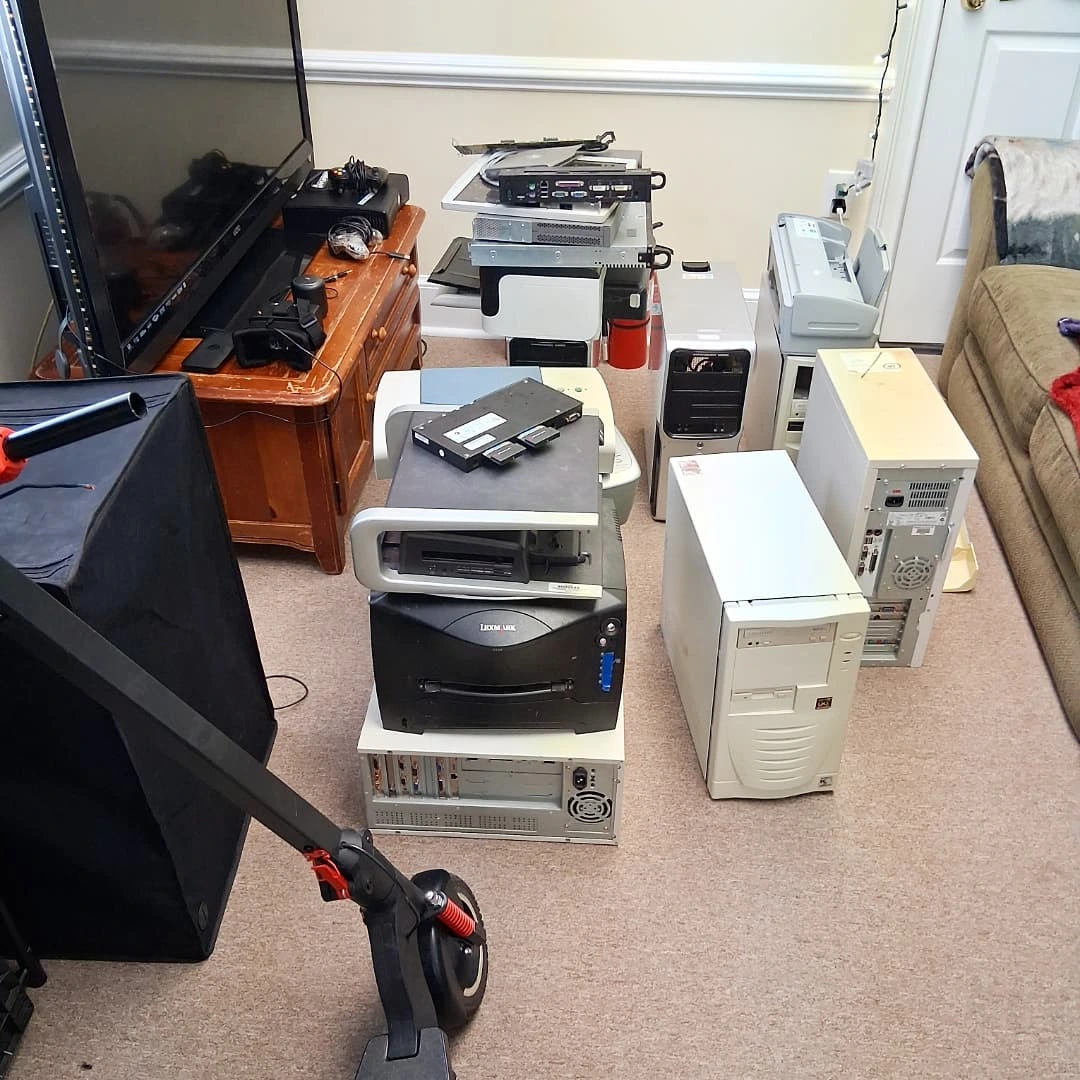
Commonly Salvaged Components
Each category of old electronics hides unique treasures. Here’s what you can typically recover:
| Source Device | Useful Parts | Applications |
|---|---|---|
| Printers & Scanners | Stepper motors, rails, belts, sensors, gears | Robotics, 3D printer repair, pan/tilt rigs |
| Desktop PCs & Laptops | Fans, heatsinks, power supplies, RAM, hard drives | Cooling, storage, server builds |
| Routers & Modems | PCBs, antennas, cases, voltage regulators | Mesh networks, radio projects |
| Audio Equipment | Speakers, potentiometers, amplifier boards | Custom sound rigs, monitoring systems |
| Old Phones & Cameras | Microphones, lenses, LEDs, small batteries | Surveillance tools, sensors |
| Monitors & TVs | Power boards, display panels, casing | DIY displays, lighting control |
Each salvaged item is a potential learning module — a small system you can study, reverse engineer and reincorporate into new technologies.
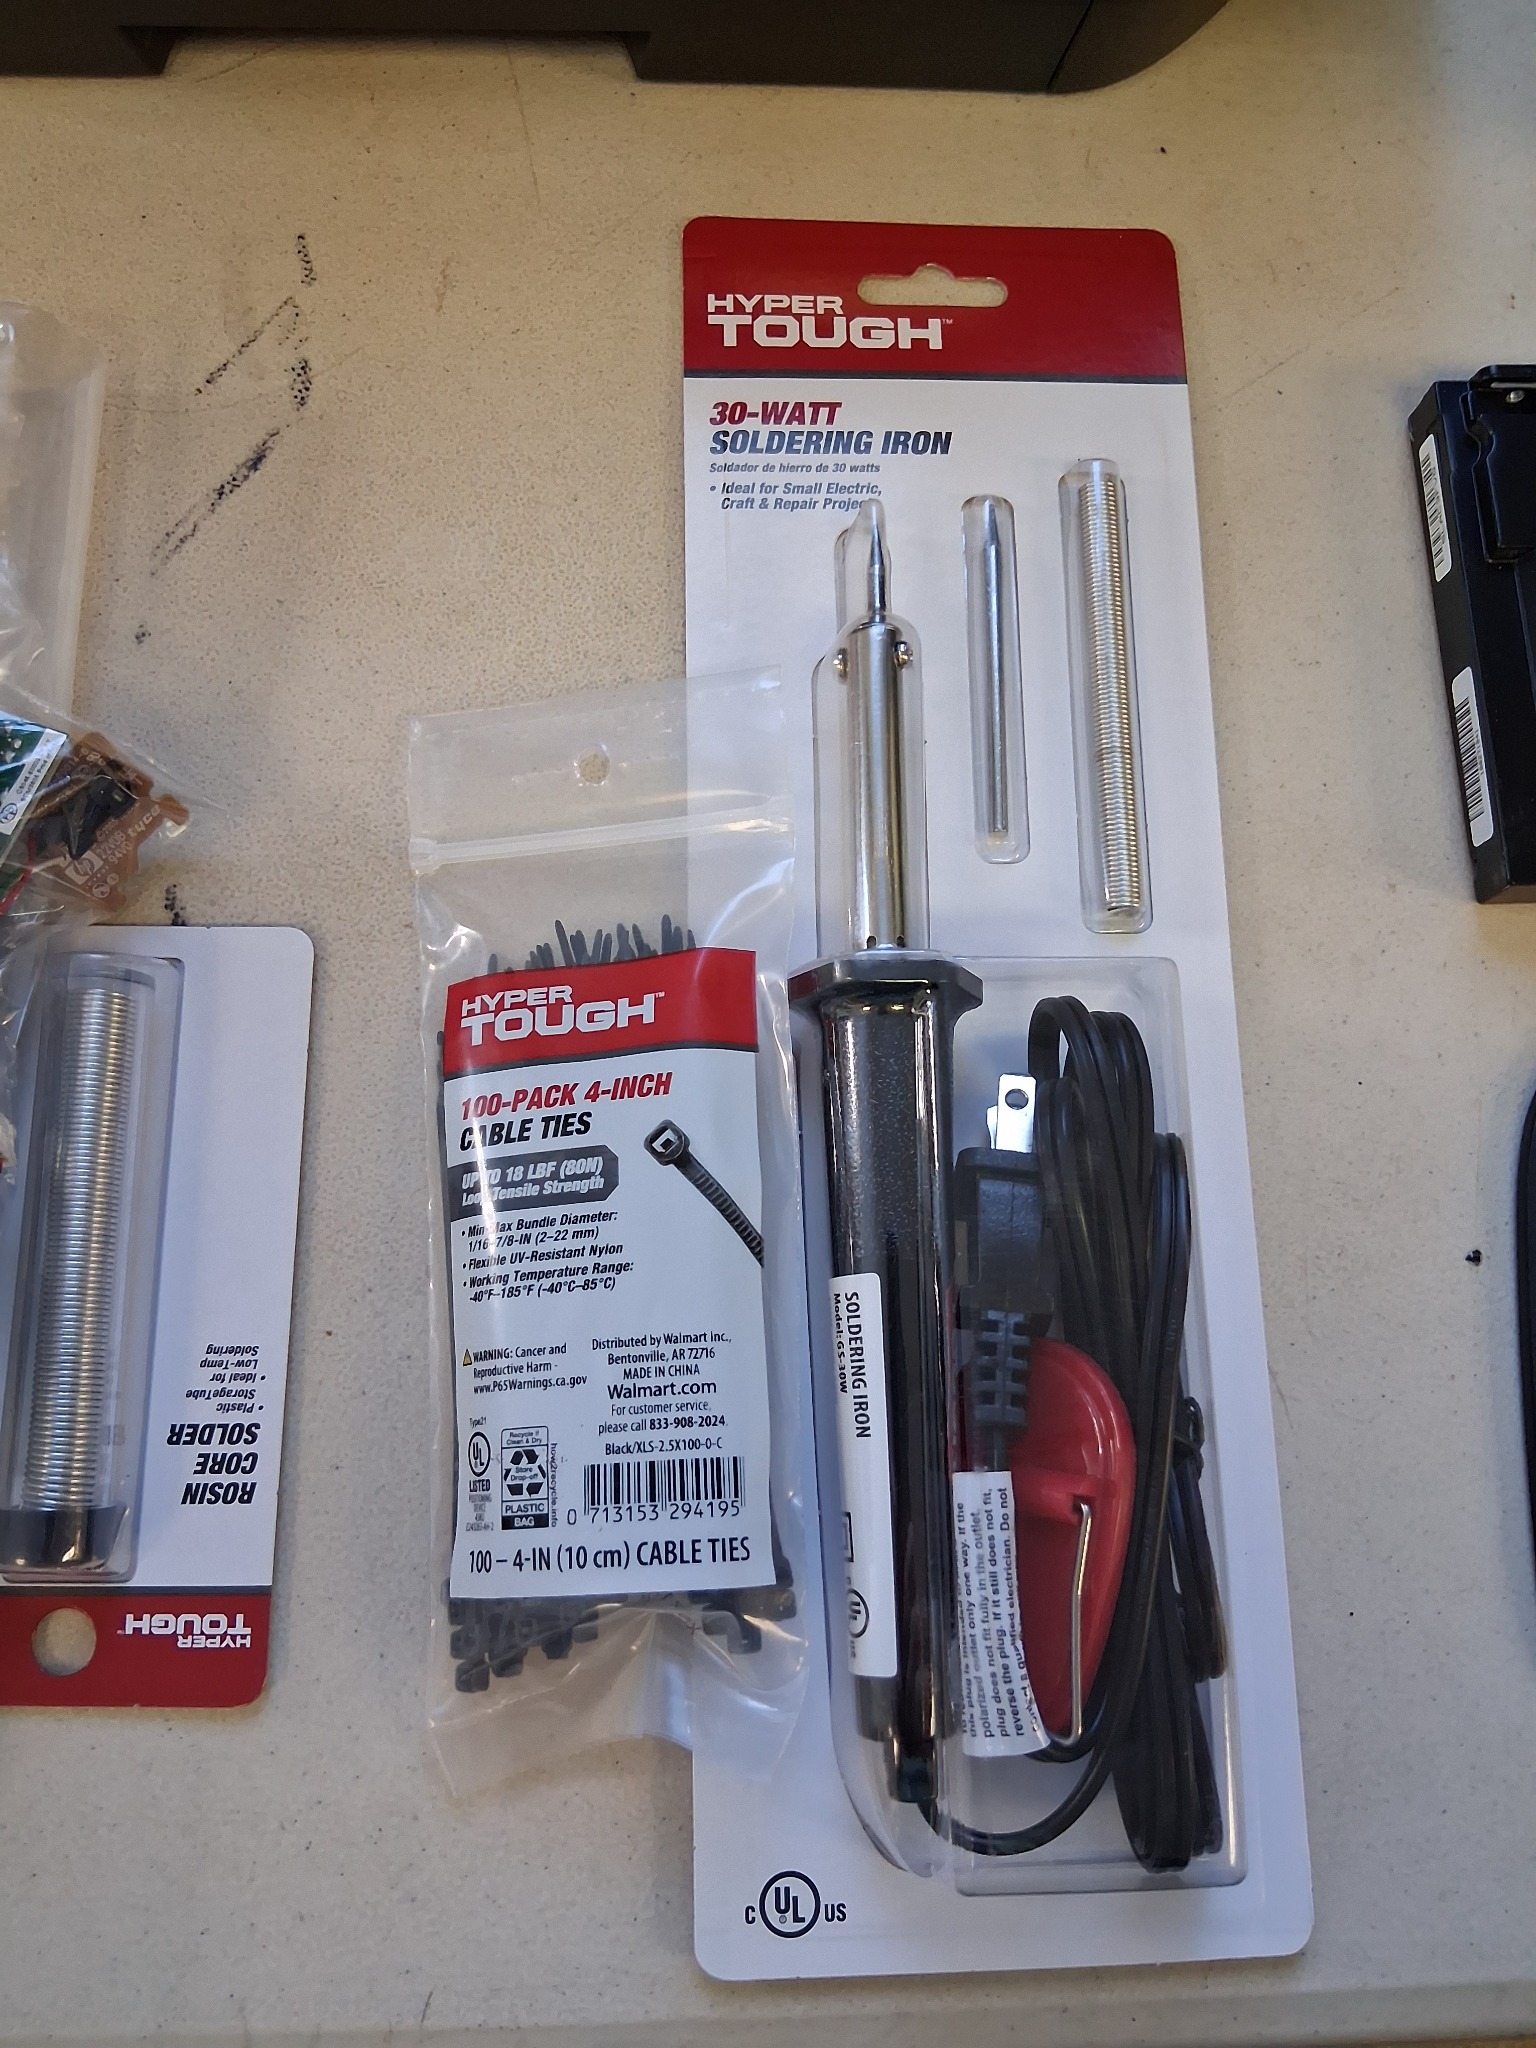
THE ART OF THE SOLDER:
🔩 What Is Soldering?
Soldering is the process of joining two or more electronic components together by melting a metal alloy (called solder) to create a strong electrical and mechanical connection. Think of it as “metal glue” for circuits — when the solder cools, it solidifies and locks the wire or component firmly in place.
For any field operative, maker, or engineer, soldering is a foundational skill. It turns ideas into working prototypes, allows you to repair rather than replace, and transforms broken tech into mission-ready tools. Mastering soldering means gaining control over your own hardware and learning to see circuits as living systems you can rebuild, improve, or hack to serve your mission goals.
HOW TO SOLDER- BASIC SOLDERING PROJECTS:
SOLDERING A PAIR OF WIRES TOGETHER
PART 1: Prep the Wires
This is 90% of the job. Good prep = good soldering!
✅ 1. Strip the wires
- Cut off about 1.5–2 inches of the outer USB cable sheath
- Expose red, black, white, green wires
- Strip ~¼ inch of insulation from the ends of each wire
- Do the same to the matching wires from the HP USB board cable
✅ 2. Twist the matching wire pairs together
Twist each pair like a candy cane—no gaps, just copper touching copper.
✅ 3. Pre-tin the iron
- Plug it in, let it heat up for 2–3 minutes
- Touch the solder to the tip (not the iron itself)—it should melt quickly
- Wipe the tip on your damp sponge or paper towel
- You want a shiny silver bullet tip, not crusty or dull
PART 2: Solder the Wires
✅ 1. Pre-tin each twisted pair
- Touch your hot iron under the twisted wires
- Feed just a little solder from above
- The solder should flow into the copper and wrap it
Repeat for all 4 twisted pairs.
TIP: If it smokes a little, that’s normal (from the flux inside the solder). If it smells like death? Pull back a sec.
✅ 2. Secure the joints
After all 4 pairs are soldered and cooled:
- Tug each joint lightly. If it holds, you're golden.
- Wrap each connection in a small piece of tape (or heat-shrink if you slid it on before)
- Then wrap all four in one bigger wrap or zip-tie together for neatness
PART 3: Test It
✅ 1. Plug the USB-A end into your HP t530
- Boot it up
- Plug in a flash drive or USB mouse into the HP front panel board
- If it lights up or responds—you just soldered your first custom mod like a beast.
🔥 Extra Pro Tips:
- Don't touch the silver part of the iron—it gets HOT AS HELL
- If solder doesn’t melt in 2 seconds—iron’s not hot or not clean
- Hold the iron like a pencil, not like a hammer
- Always melt solder onto the part, not onto the iron
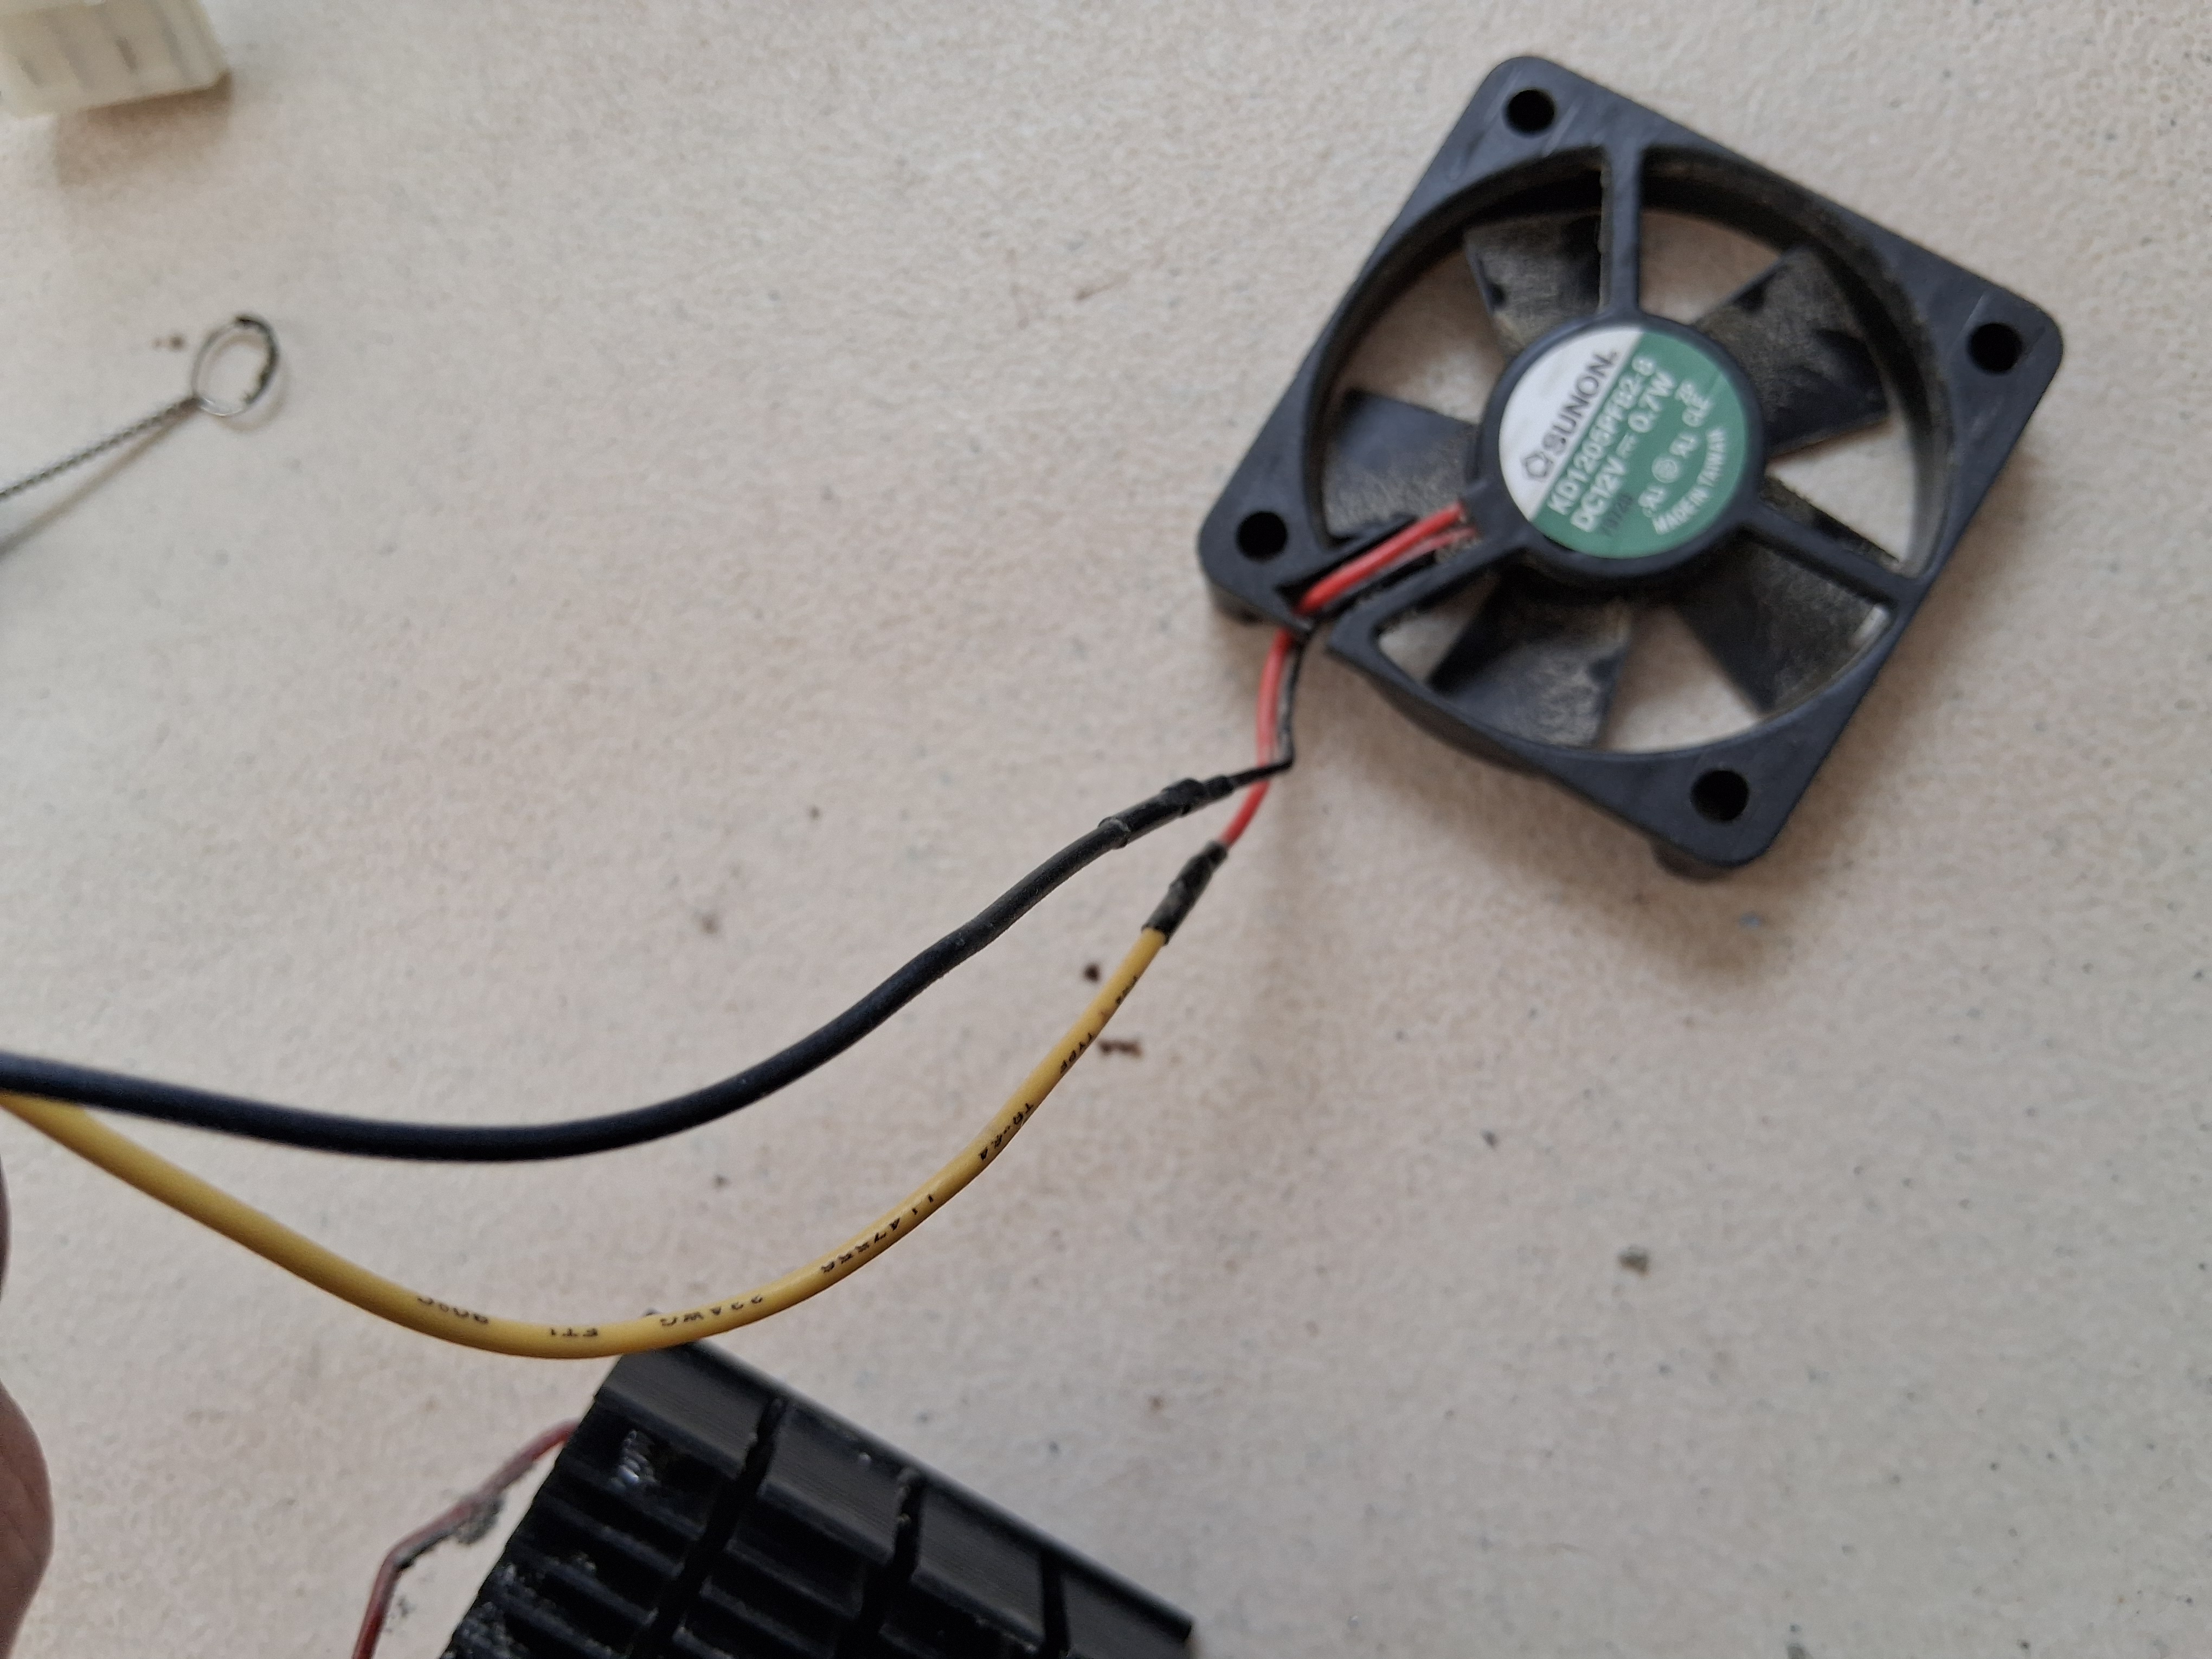
HOW TO: USB to 5V Fan Power Cable

- Old USB cable (charging/data cable you don’t mind cutting)
- 5v fan
- Wire cutters/strippers
- Electrical tape or heat shrink tubing (optional but cleaner)
- Solder (optional, but not required—twisting wires works fine)
🔧 What You Need:
- Cut the USB cable near the end that plugs into a device (keep the USB-A side)
- Strip off about 1–2 inches of the outer jacket to expose 4 wires
✂️ Step-by-Step:
1. Cut & Strip the USB Cable
| USB Wire | Fan Wire | Function |
|---|---|---|
| Red | Red | +5V Power |
| Black | Black | Ground (GND) |
| White / Green | Not Needed | Data lines - not needed, ignore or trim |
| Yellow | - | Not used (RPM/speed sensor) |
Strip Red and Black wires about 1/2" to expose the copper
2. Prep the Fan Wires
- Red = +5V
- Black = Ground
- Yellow = RPM signal (not used)
The ADDA fan has 3 wires:
Strip the red and black wires
3. Twist & Tape
- Twist USB Red → Fan Red
- Twist USB Black → Fan Black
- Tape each individual wire, then wrap both together
Optionally solder the twisted connections, then tape or heat-shrink
4. Plug In & Test
Plug the USB cable into:
- A laptop
- A powered USB hub
- A USB wall charger (5V)
Fan should spin up immediately.
✅ Installation Tips:
- Mount the ADDA fan near the t530 copper heatsink or as an intake
- Plug into a rear USB port on the t530 or run to an external hub inside the case
- Route cable neatly along chassis edges with tape or clips
Using Old Routers to Create a WAN "Wide-Area-Network"
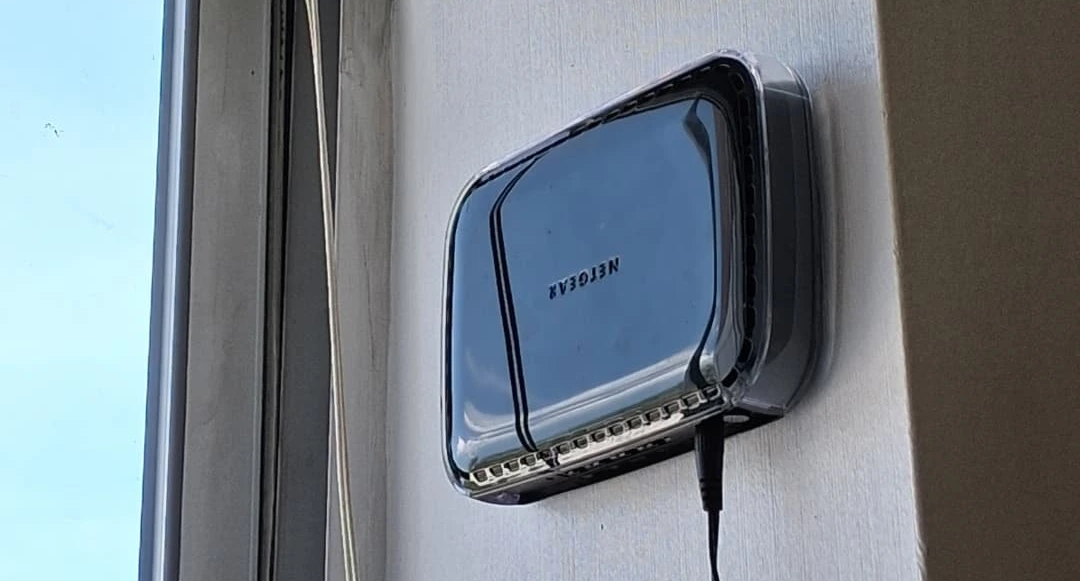
💡 Mission Concept
The idea was simple but powerful: reuse and reconfigure old routers to serve as wireless bridges, repeaters, and access points. By doing this, we extended the reach of our primary internet connection across the building — ensuring even isolated workstations like our HP ThinClient Linux terminal could maintain stable connectivity without running new cables or buying commercial-grade mesh hardware.
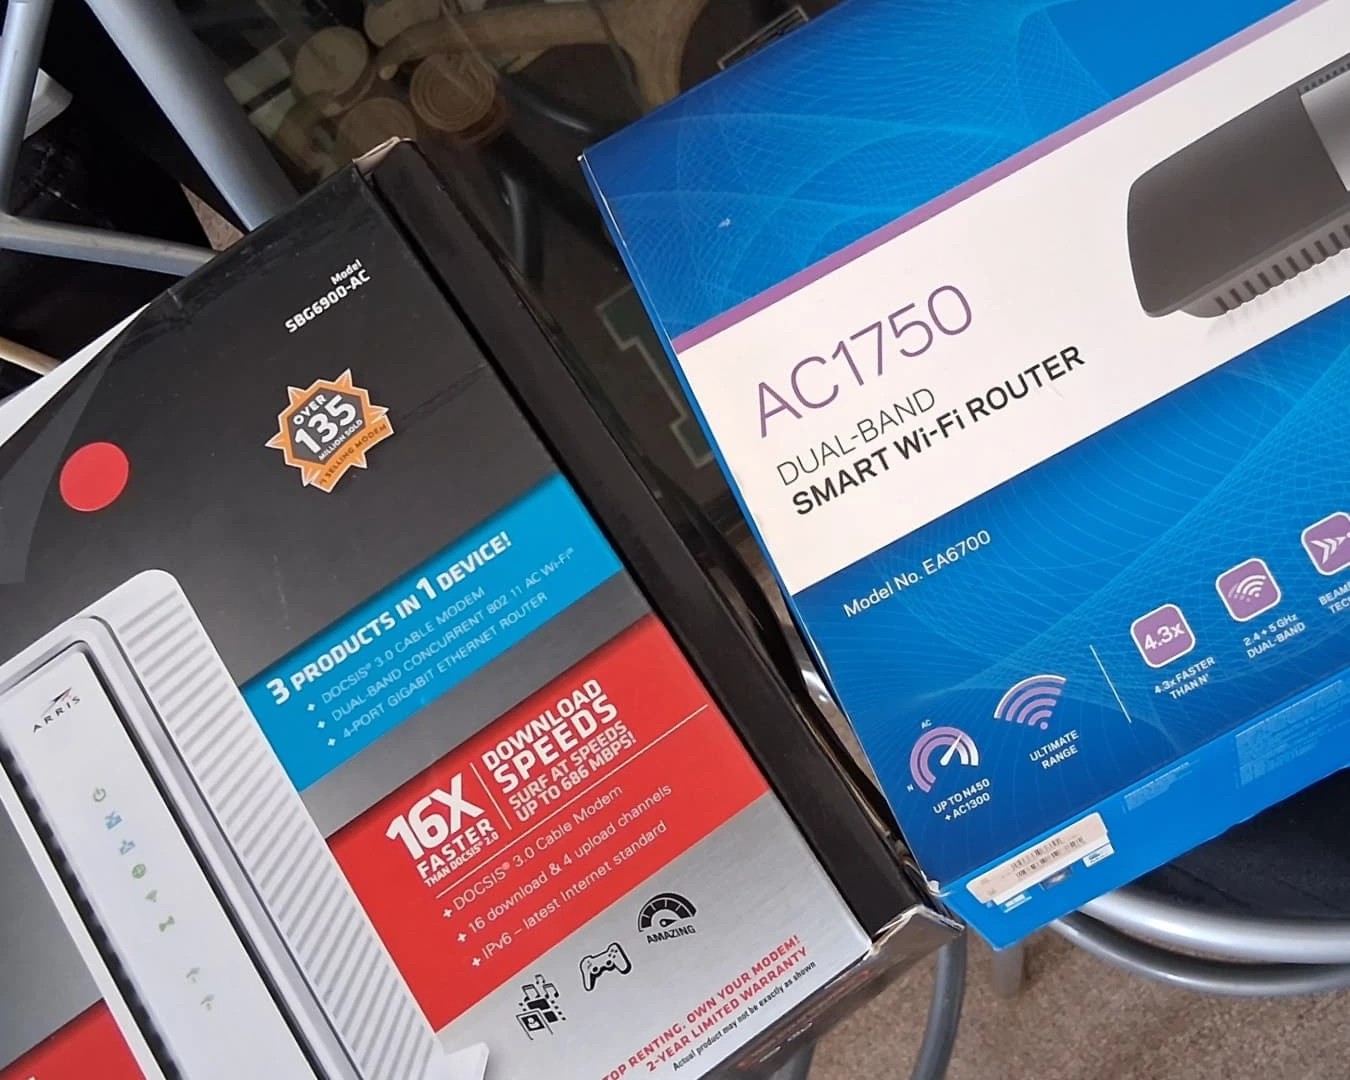
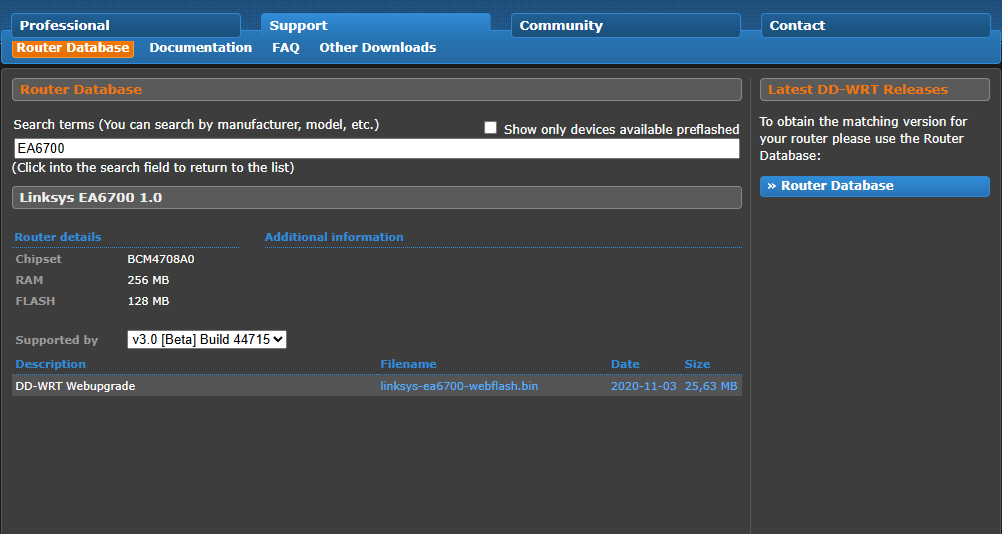
- Linksys EA6700 (AC1750) — flashed with DD-WRT firmware, reconfigured as a repeater/client bridge.
- Netgear router — mounted by the window as an uplink to the main Cradlepoint/AP.
- Spare coaxial and Ethernet modems (SBG6580 & other models) were retained for backup experimentation and testing.
📦 Equipment Inventory
We utilized the following legacy devices:
- Flashed DD-WRT firmware onto the Linksys EA6700 using a TFTP recovery method on Linux Mint.
- Installed the CFE-modified bootloader for advanced access and fallback protection.
- Wireless Mode: “Client” or “Repeater Bridge”
- SSID: Connected to the primary AP 2A8148 via Wi-Fi
- WAN Mode: Disabled or DHCP based on scenario
- Virtual Interface (optional) to rebroadcast new local SSID if needed
- Adjusted bridging (br0), firewall rules, and DHCP forwarding
🔧 Flashing + Configuration
Accessed DD-WRT’s web UI to configure:
Monitored ping responses and routing tables from the HP ThinClient to verify successful WAN bridging.
📡 Network Behavior & Lessons
Dual-band routers (2.4GHz + 5GHz like the EA6700) allow flexible connections and better throughput, but we prioritized 2.4GHz for range.
Single-band routers can still be useful as backup repeaters or for short-range segments.
Using DD-WRT allowed us to unlock advanced settings, VLAN control, MAC filtering, and wireless bridging not supported by default firmware.
Ethernet fallback remains a more stable option, but Wi-Fi is fully operational for roaming nodes like the ThinClient.
🌐 Outcome
We now have wireless coverage across the entire building, including areas that previously had no signal. Our ThinClient workstation connects seamlessly to the office Wi-Fi using the repurposed Linksys router. The BLACKBOX 200 server and mesh dashboard stay online reliably — a huge win for local operations, file sharing, and LAN-based dashboards without relying on ISP availability.

Building the BlackBox
🖥️ Mission Summary: The Blackbox200 Transformation
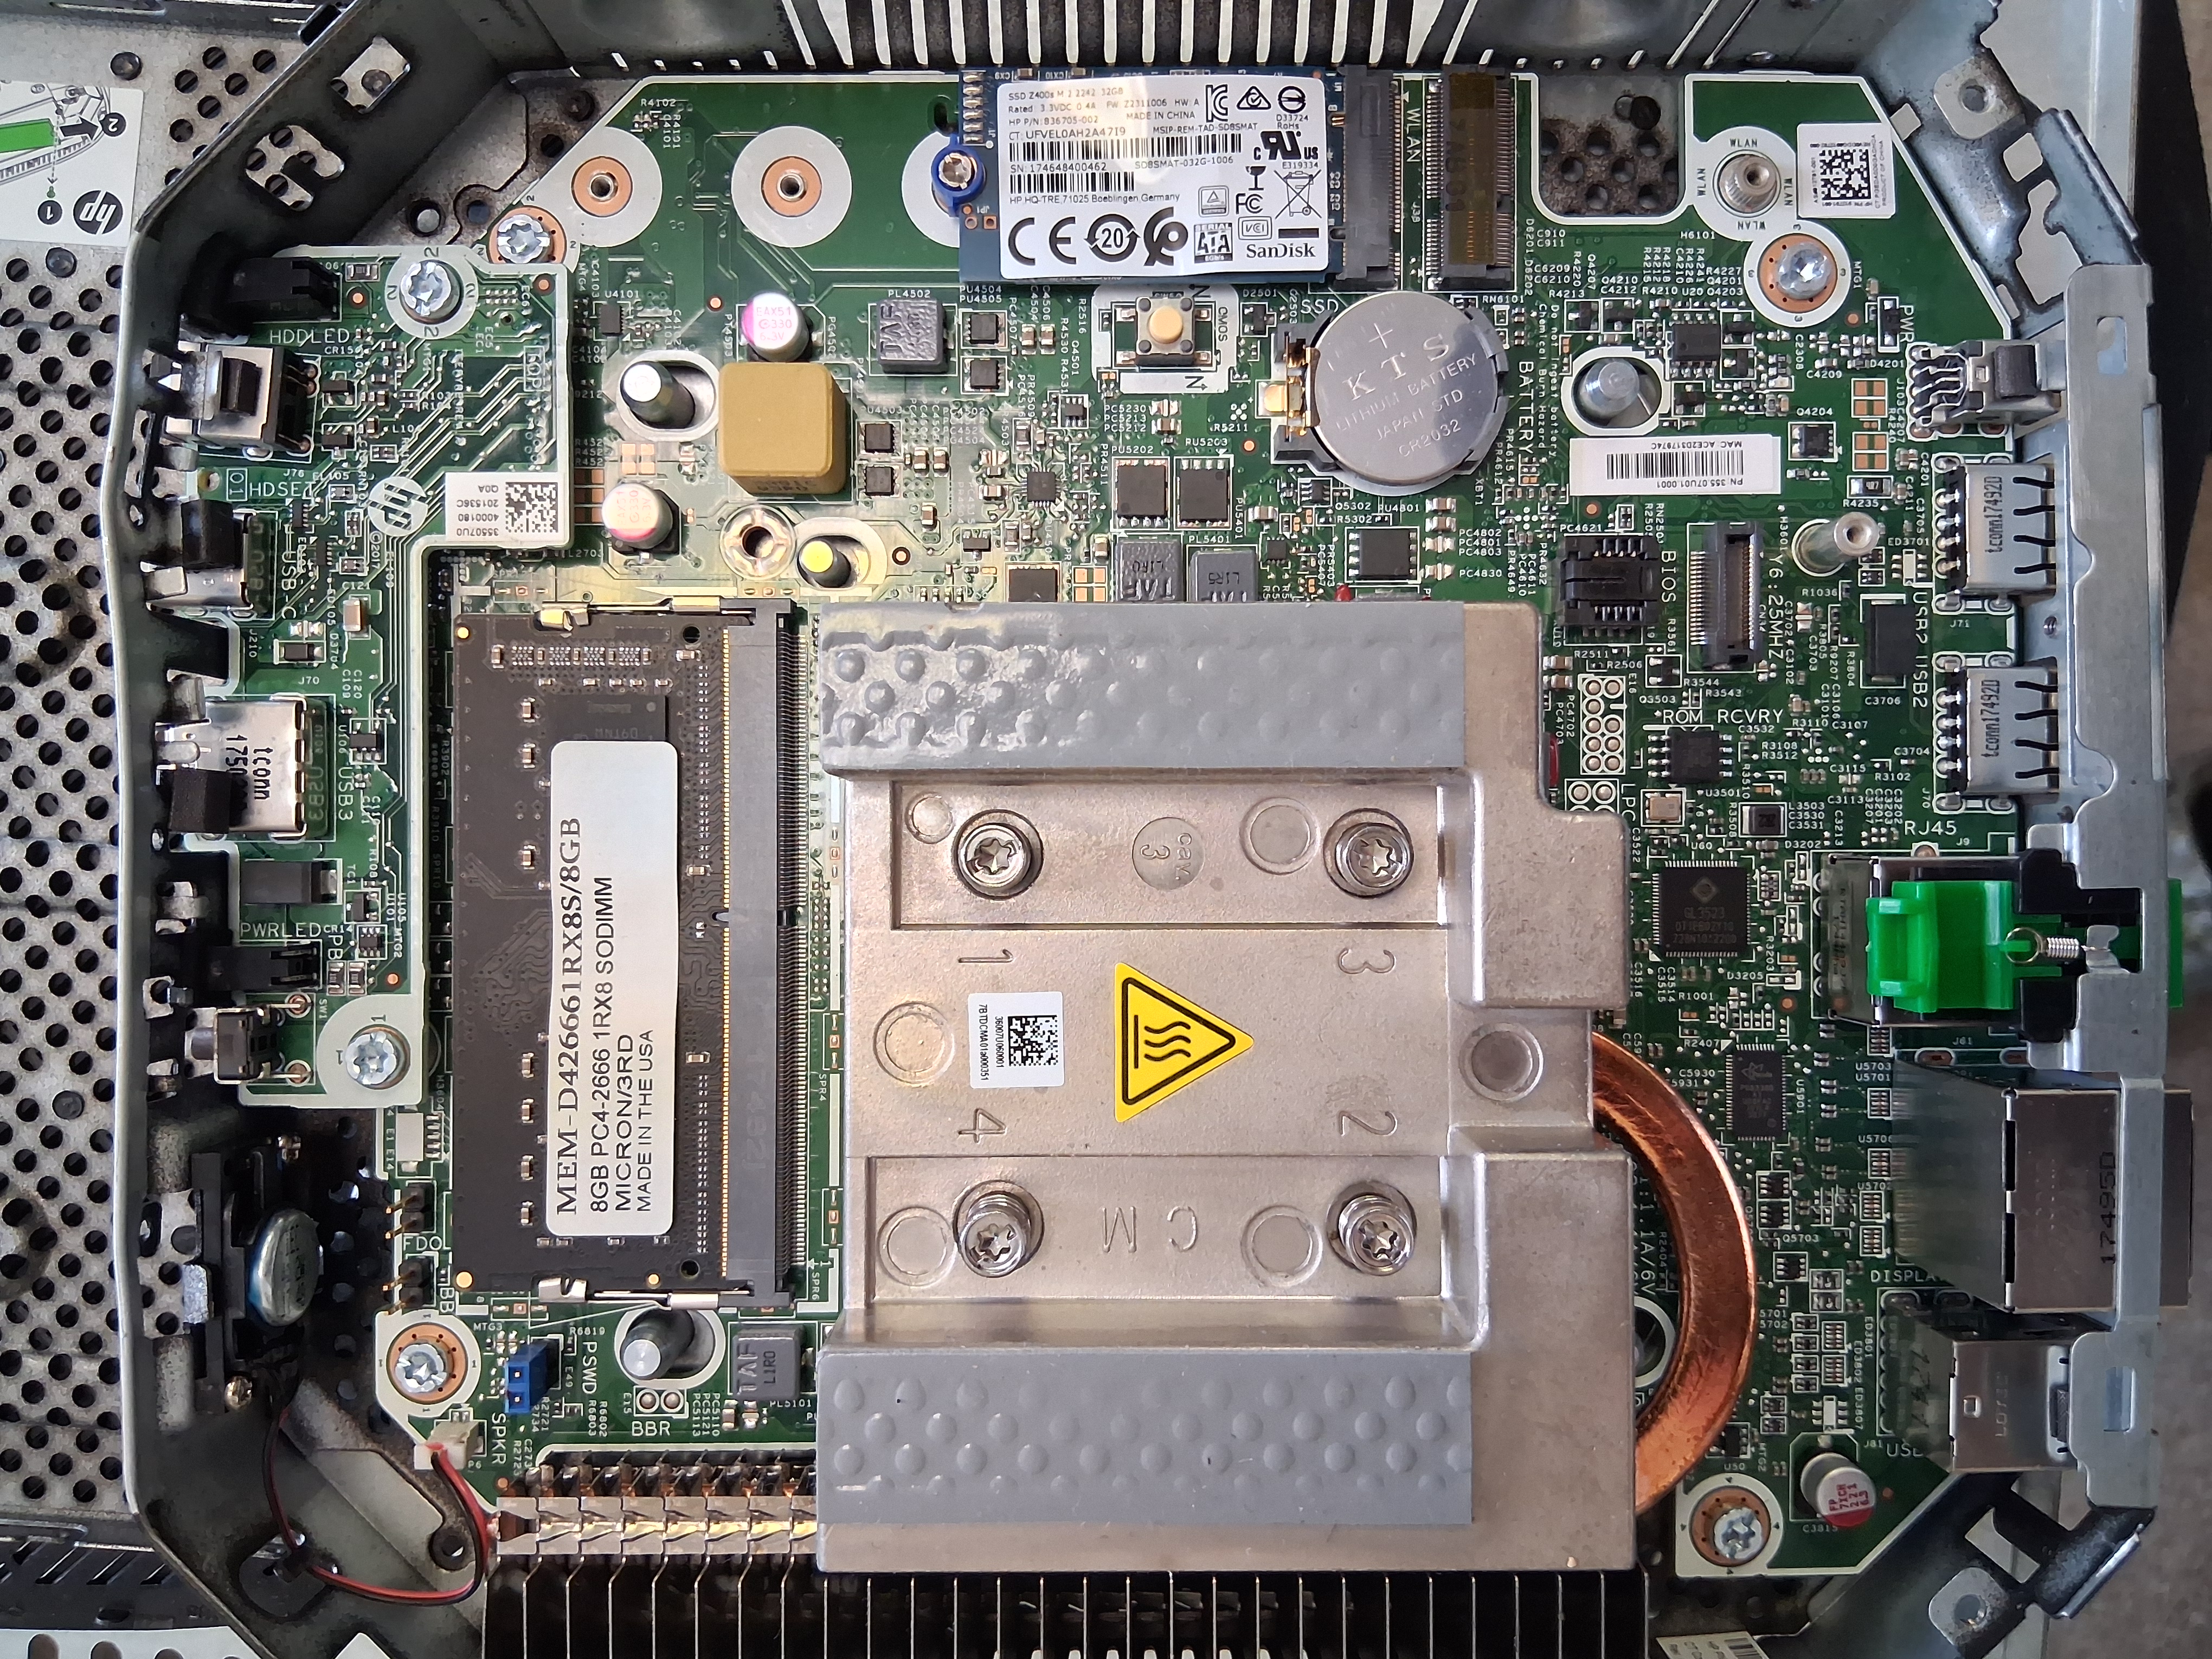
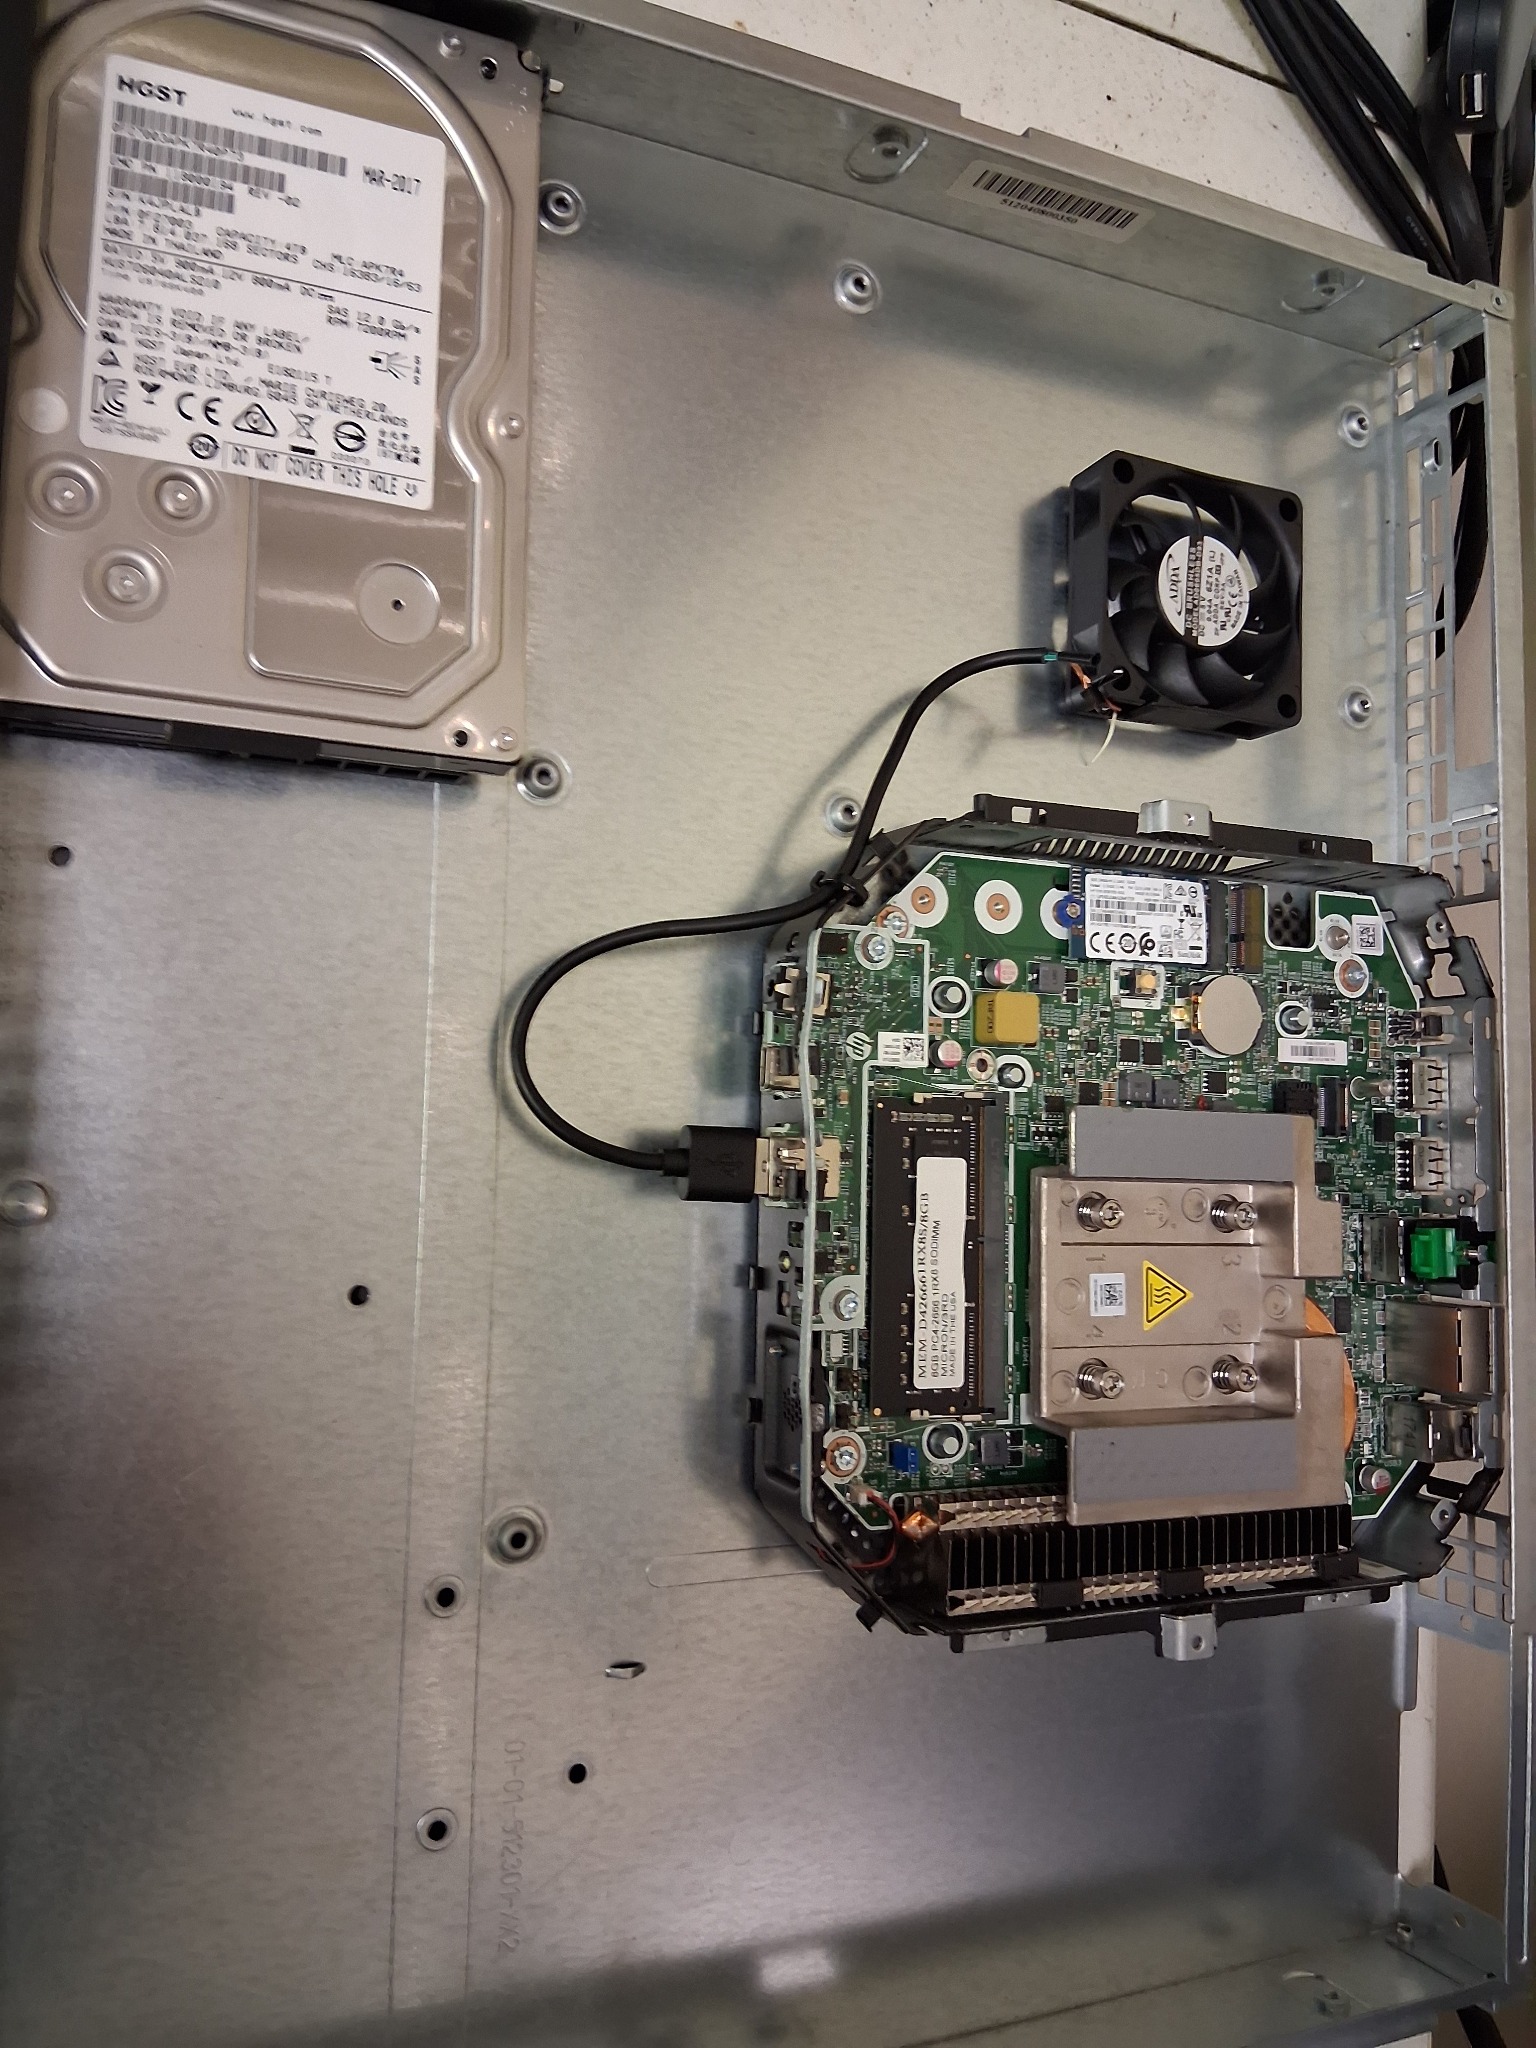
We began with a retired Barracuda 200 Spam Firewall server, a relic from the early 2000s — heavy, industrial, and outdated. After analysis, we determined that the internal hardware was no longer viable for modern use.
Instead of discarding it, the Barracuda 200 unit was gutted of its proprietary electronics, and we repurposed the chassis as a functional server enclosure. Inside, we installed:

- A HP Thin Client running Linux Mint
- A SATA hard drive connected via USB adapter
- Custom cooling fans powered through the motherboard
- Rewired peripheral connections for USB and HDMI access
Custom mounts and brackets were fabricated to secure the new components.
The result: a compact, quiet self-hosted server that runs Linux and hosts our mesh dashboard and other backend services, built entirely from reclaimed technology.
Total cost: $0
Outcome: A fully operational HQ workstation for data, mesh control, and internal AI testing.
This mission proved that obsolete hardware can be reborn with knowledge, creativity, and persistence — the true spirit of ATHENA INTELLIGENCE SOLUTIONS.
A Self‑Hosted Server
- Hosts web UI, API interface, dashboards, tools
- Routes or reverse proxies to LLMs running on the gaming desktop
- Stores scripts, logs, static assets
- Admin accessible from any device on the LAN
Acts as a LAN-based frontend node for your locally hosted LLMs.
The refurbished BlackBox now serves as the heart of our communications lab. It provides a local MQTT broker, a Node‑Red instance and storage for logs and mission data.
By self‑hosting these services, we maintain full control over our data and can operate without internet access. The server can also be deployed in the field, bridging our mesh network with Wi‑Fi or ethernet clients.
Current Tasks:
- Finalise enclosure modifications and install additional dust filters.
- Document the build process for other teams to replicate.
- Implement automated backups and monitoring tools.
- Explore using secondary hardware as redundant servers for critical missions.
🚀 Future Goals
- Installing server-grade software for local hosting and dashboards.
- Integrating it into the INSPIRE HQ network for mesh, data, and media management.
- Beginning PROJECT GODSEED, our experimental self-hosted baby AGI — powered entirely from within our own infrastructure.